Dough Ornaments for Kids to Make

Remember playdough? The fun of squeezing and shaping and modelling weird and wonderful sculptures that looked like nothing on earth?
Well, if your kids use salt dough the sculptures that they create for you so lovingly can be preserved for years. Salt dough is a cheap home-made alternative to commercial playdough. With it your children can create longer-lasting pieces of art that can be given with love as gifts, and may even end up as heirlooms of the future.
Salt dough making has its beginning way back in history: the Ancient Egyptians were among the first use it. And it’s still very popular today, not only with children but with craftsmen and women. It’s loved for its ease of use, its versatility, and the fact that you’re quite likely to find everything you need to make it right there already in your kitchen.
What You'll Need:
- 2 cups flour
- ½ cup salt
- 1 cup water
- Extra flour for rolling
How to Make Dough Ornaments
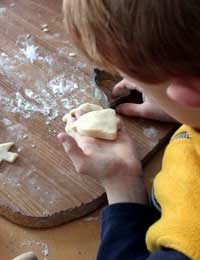
Mix the flour and salt together and then add enough water to make a dough that should be very stiff and not sticky. Add the water drop by drop until you get the right consistency. Place the dough in an airtight bag and leave to rest for an hour or so.Knead the dough until it’s pliable then roll it out, on a floured board, to a thickness of ¼”. For beginners and younger children, use a cookie cutter to cut out shapes. (When you’re choosing the size of the cutter, remember that the dough will shrink slightly when it’s dried.) If you don’t have a suitable cookie cutter, draw shapes on paper that you can cut out and use as templates. The more adventurous or creative can make up their own shapes: dinosaurs, elephants, ducks, strawberries!
Using a straw, make a hole right through the dough close to the top so that a ribbon can be threaded through later.
Place the shapes on a foil-lined baking tray and cook in the oven at 120oC for 2 hours, turning occasionally until completely dry.
When dry, you can paint the ornaments using thick, brightly coloured paints – not water-colours - and when the paint is dry, varnish them. You’ll need several coats of varnish allowing time in between each coat for it to dry. The varnish will give a lovely shine, make the colours brighter and, most importantly, preserve the ornament. To prevent it going soft with time, make sure there are no little gaps in the varnish covering through which it could absorb moisture from the air.
When the varnish is completely dry you can make a hanger for the ornament. Take a 10” length of narrow ribbon, fold it in half, and knot the ends together. Slip the loop of ribbon through the hole you’ve left at the top of the ornament, then pop the knotted end through the loop and pull it tight, to make a secure hanger.
Decorating Your Dough Ornament
- You can colour the dough using food colouring, kneading it thoroughly to ensure a consistent shade.
- Uncooked salt dough will keep for about a week in an airtight plastic bag.
- Keep the dough you’re not working with covered in clingfilm or an airtight bag to stop it drying out.
- Using too much flour when you’re kneading or rolling out can make the pastry crack and break while cooking.
- Create an interesting surface for the ornament making an impression on it, before cooking, using household items, such as a cheese grater, or fruit.
- To create a more 3D effect, add raised shapes to the ornament. Make them out of extra dough and attach them, before cooking, using water as glue.
- Air-drying, which results in a whiter colour, can take a week or more, and if it’s humid the ornaments probably won’t dry out properly at all.
- To add a sparkle, before varnishing, brush with glitter glue.
- Make fridge magnets or brooches in the same way as hanging ornaments – only don’t make a hole at the top. Stick a brooch pin or magnet (available from craft and haberdashery shops) on the back.
- Record your child’s name and the date on the back of the ornament using a permanent felt-tip pen.
So next rainy afternoon, you know what to do! Be creative and have fun!
Note: These ornaments are not edible once they have been decorated, though the dough itself is quite edible before decoration (though very salty!) so very young children can work safely with it.

Re: Teaching Kids Food Hygiene
love it Find kids cooking recipes that are easy, quick and cheap. Search for fun recipes for cooking with kids including kids…
Re: Foraged Feasts: Autumn and Winter
i like this advertisement. i will learn more out of this
Re: Main Meals for Kids
This is a brill website as I have made the Tommy Pasta and The Fishy Dishy. It is lush although not enough for me and the family
Re: Teaching Kids Where Food Comes From
I like this website it helps alot with my children homework
Re: Baking Bread With Kids
This doesn’t deal with involving the kids. When the dough is ready for kneading is a good time to bring them in as they’ll enjoy pounding…
Re: Teaching Kids Food Hygiene
micro organisms stick because they are little think that can go on the kitchen {even the ass}
Re: Cookies and Biscuits
For a really delicious variation on the oaty cookies, add raisins. I had oatmeal and raisin cookies in the US and they're delicious. Plus, in…
Re: Kitchen Safety for Kids
All the information is very useful because I love cooking. Thank you so much. It would be so useful for my brother.
Re: Pizzas and Toppings
Wow pizza turned out great I'm going to use this recipe all the time I don't think I'm ever going to buy a take away again !
Re: Cookies and Biscuits
My whole family love the choc chip cookies brill recipe